How to Train Stable Diffusion to Get the Highest Quality Results Possible


Subscribe to our blog to receive recent updates
Today, artificial intelligence (AI) and machine learning (ML) no longer surprise anyone, and as time goes by, more and more AI tools are appearing that already help in content creation, big data analysis, and software development. Generative neural networks, which create large texts and images based on a text query (prompt), gained particular popularity. One of the most powerful tools for generating images is Stable Diffusion, which performs its task on usual computers and even smartphones.
While using such tools, the user wants to get the best possible result, which depends on the accuracy of the text query, the model and the degree of training. In this guide we tell you about Stable Diffusion models, how they can be used and how they are trained, as well as share our own experience in working with image generation tools.
What is Stable Diffusion?
Stable Diffusion is a neural network based on deep learning algorithms that, as we wrote above, generates images based on the user's text query. It is an open source technology that allows you to train stable diffusion with your images to receive results you want.Stable Diffusion is based on an algorithm called «latent diffusion». It uses random noise to make a new image, which it processes using an iterative noise reduction algorithm and a text encoder. After performing several processing steps, the final image is obtained. Some studies show the computational efficiency of such algorithms, so that they can run on user devices and not only on high computing power devices. Moreover, the images produced by latent diffusion algorithms are higher in quality compared to the results of deep learning (DL) algorithms.
Ways to use neural networks for image generation
Stable Diffusion found its application for many tasks where high quality image generation is required:- Generating an entire image from a text query. In this case we are talking about creating an image from scratch, using only a custom prompt. The original tools have such functionality, where you can enter a query and select a model to generate an image.
- Image-to-image generation. Some tools can use photos as a starting point for making a generated image. Users are now massively using the Loopsie app, which was previously known as a general photo editor, and now it has AI capabilities to turn photos and video into stylized content. The creators of the app trained their own models based on Stable Diffusion to process photos and videos on a huge dataset. Since such algorithms can be executed on users' devices, even smartphones, such tools were released as a mobile app.
- Inpainting and outpainting images. Changing some elements in a photo (inpainting) or rendering the background of the original image (outpainting) is another way to use image generation. Algorithms are based on analyzing data that is obtained from an existing image, "reimagining" and remaking images, or changing some of its details at the user's request. Last year, DALL-E provided such an opportunity, and this year Adobe introduced Firefly – AI tools that are implemented in their photo and video editors: Photoshop and Premiere Pro.
How to train Stable Diffusion models
For training a Stable Diffusion model, we actually need to create two neural networks: a generator and a validator. The generator creates images as close to realistic as possible, while the validator distinguishes between real and generated images and answers the question whether the image is generated or not.This training method is called adversarial and it works the following way: if the validator can identify the generated image, the generator will be improved to create more realistic results. If the validator fails to detect the generated image, then it will be improved to better find neural network results. This approach explains why Stable Diffusion's results can be so stunningly realistic.
In terms of its essence, the Stable Diffusion trainining doesn’t differ from training different other types of neural networks so much, so the whole process can be generalized and divided into several stages:
- Making Stable Diffusion preprocess images for training and testing.
- Selecting and setting up an algorithm for the model.
- Training and validating (or, simply, testing) the model.
Let's consider each of these stages in more detail.
Data preparation
To make your own Stable Diffusion model, you need to collect a large amount of data for further processes.1. Select an accurate collection of data to get as close results to the desired ones as possible. It is also recommended to collect the most relevant data for your task to get better results. For example, you should not look for modern photos from the last couple of decades if you want to create images as if they were taken in the early 20th century.
2. Check the correctness of your dataset, eliminate inconsistencies and fill in the gaps in some aspects that you consider important. All of this is necessary for the main goal: to improve the quality of generated images.
3. Transform the data into the preprocessed form for training. Your entire dataset should meet the requirements of the training process: for example, all training images should be of a certain size and in a certain format. This makes training of a stable diffusion model more accurate, and as a result, the quality of results will be higher.
Selection and development of an algorithm for the model
The next preparation step is choosing algorithms, required architecture and parameters for the model. All these things depend on the problem the user wants to solve with AI, the size of the training dataset and the required accuracy of execution.Some methods proved themselves in many graphical generative AI like Stable Diffusion, DALL-E and Midjourney:
- Deep Learning Algorithms;
- Adversarial neural networks;
- Variational autoencoders.
Model training and evaluation
After preparing everything necessary, you can start training a model. For this procedure, you can use a variety of tools: from Google Colab to Jupiter Notebooks, which offer users convenient tools for training, testing and controlling neural network parameters.To train a neural network, several steps are required:
- Select the elements of the dataset on which the neural network will be trained and on which the neural network will be tested. Most often training is performed using a large amount of data (if we talk about a large and accurate neural network, then about several hundreds or thousands of images), and testing can be done with a small amount of data in a couple of dozens of objects. Datasets can be collected into an archive, which will be loaded into the model for its further customization.
- Train your chosen model on the collected dataset. If you work with Google Colab or Jupiter Notebooks, you can use the PyTorch framework for this. Note that it is a long process to train Stable Diffusion with your images that can take up to several days, especially if you are training a complex neural network on a large dataset.
- Check and evaluate the model and do the testing image generations. Once you finish training a Stable Diffusion model, it should be validated on a test dataset to check the quality of its performance. If you are fine with the result, you can run the image generation using a random noise pattern.
Our experiment with Stable Diffusion
The experiment we set up as part of our work with Stable Diffusion in img2img mode was suggested by one of our customers, and it looked like this: there is a photo of a person, and we need to generate a person with extra weight from it. To solve this problem, we successively used several popular solutions working on latent diffusion algorithms.First of all, we went to the official website of the Stable Diffusion XL neural network. The developers offer a web and mobile application for generating images from text queries using multiple models. This tool works right away, with no need for additional customization, but it didn't work for us, as it only generates images from scratch, and we needed one based on an uploaded photo, so we started looking further.
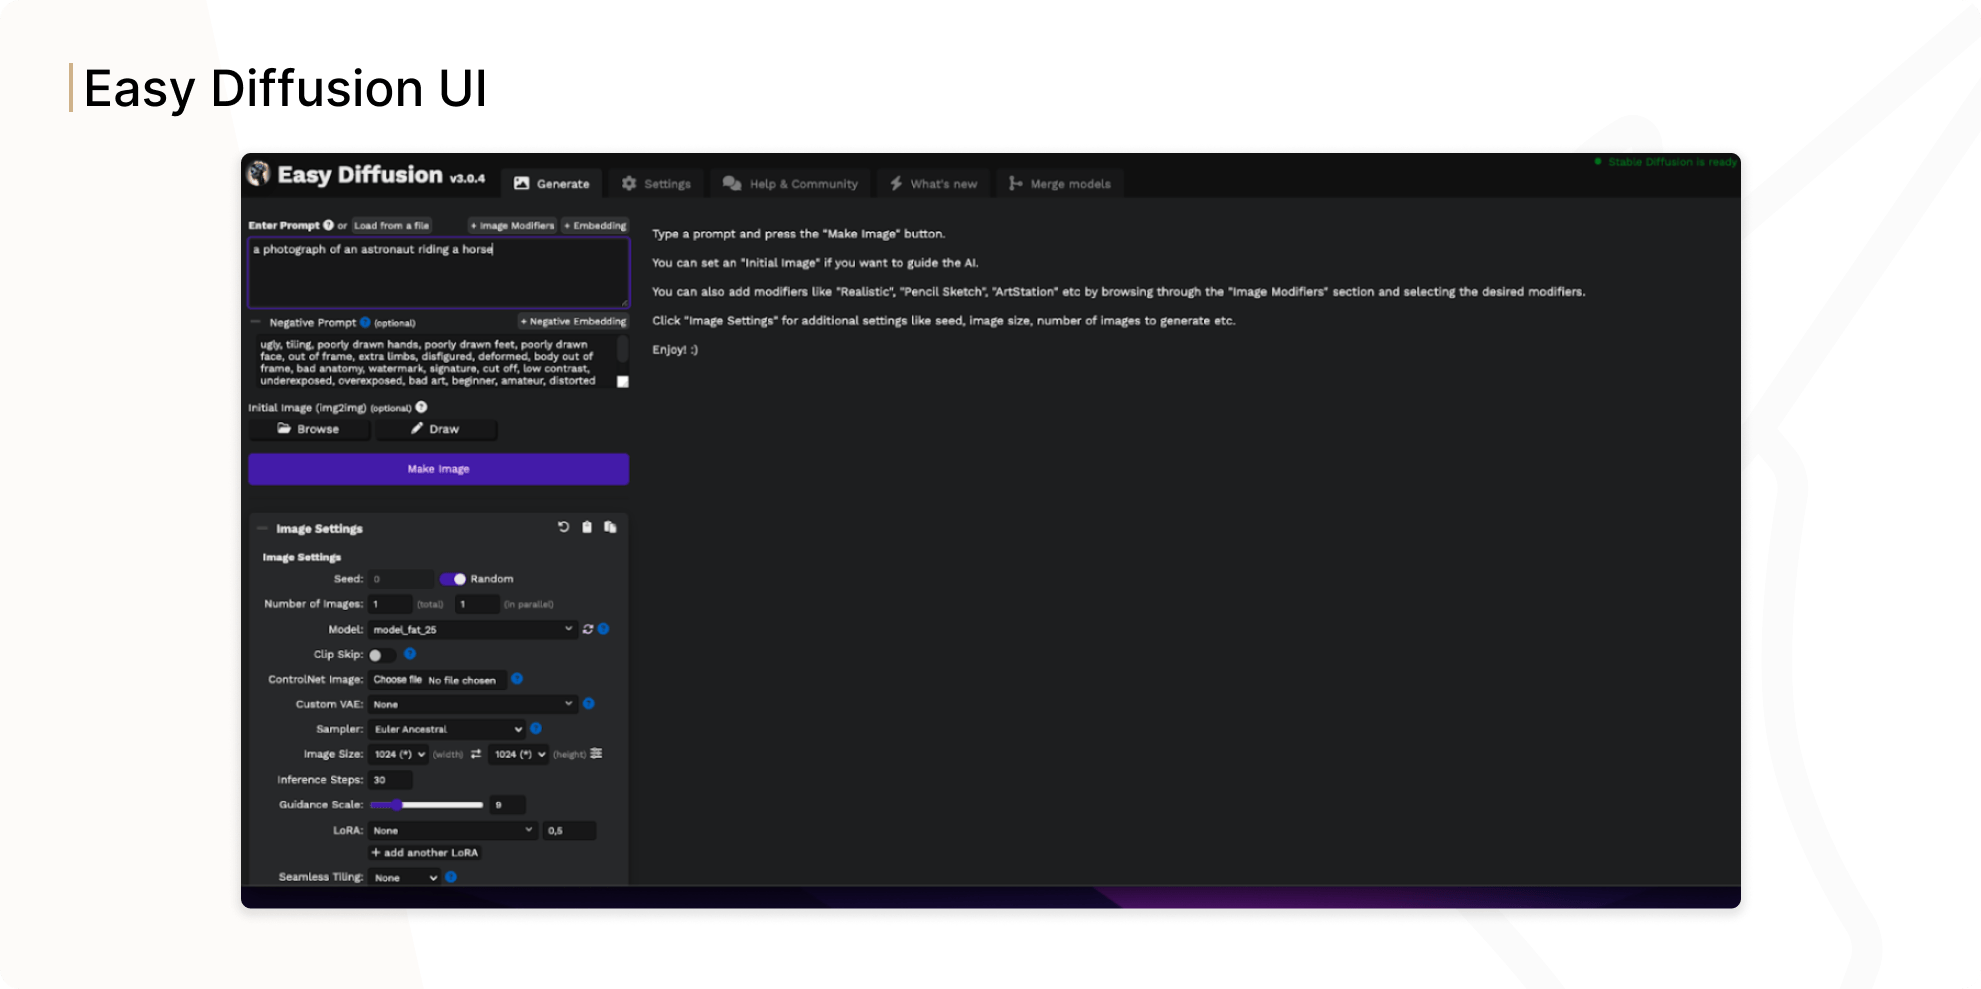
Using Easy Diffusion WebUI
To use Stable Diffusion for image-to-image generation, you need to install an interface locally on your device that supports this way of generating images and writing the prompt. We used an Easy Diffusion application, which is considered as one of the most popular solid mid-range WebUI in functionality and ease of use. There are many programs like Easy Diffusion, and all of them differ in the complexity of the functionality implemented in them. Easy Diffusion is considered to be the easiest to install and has enough functions to work with.
Dreambooth Model
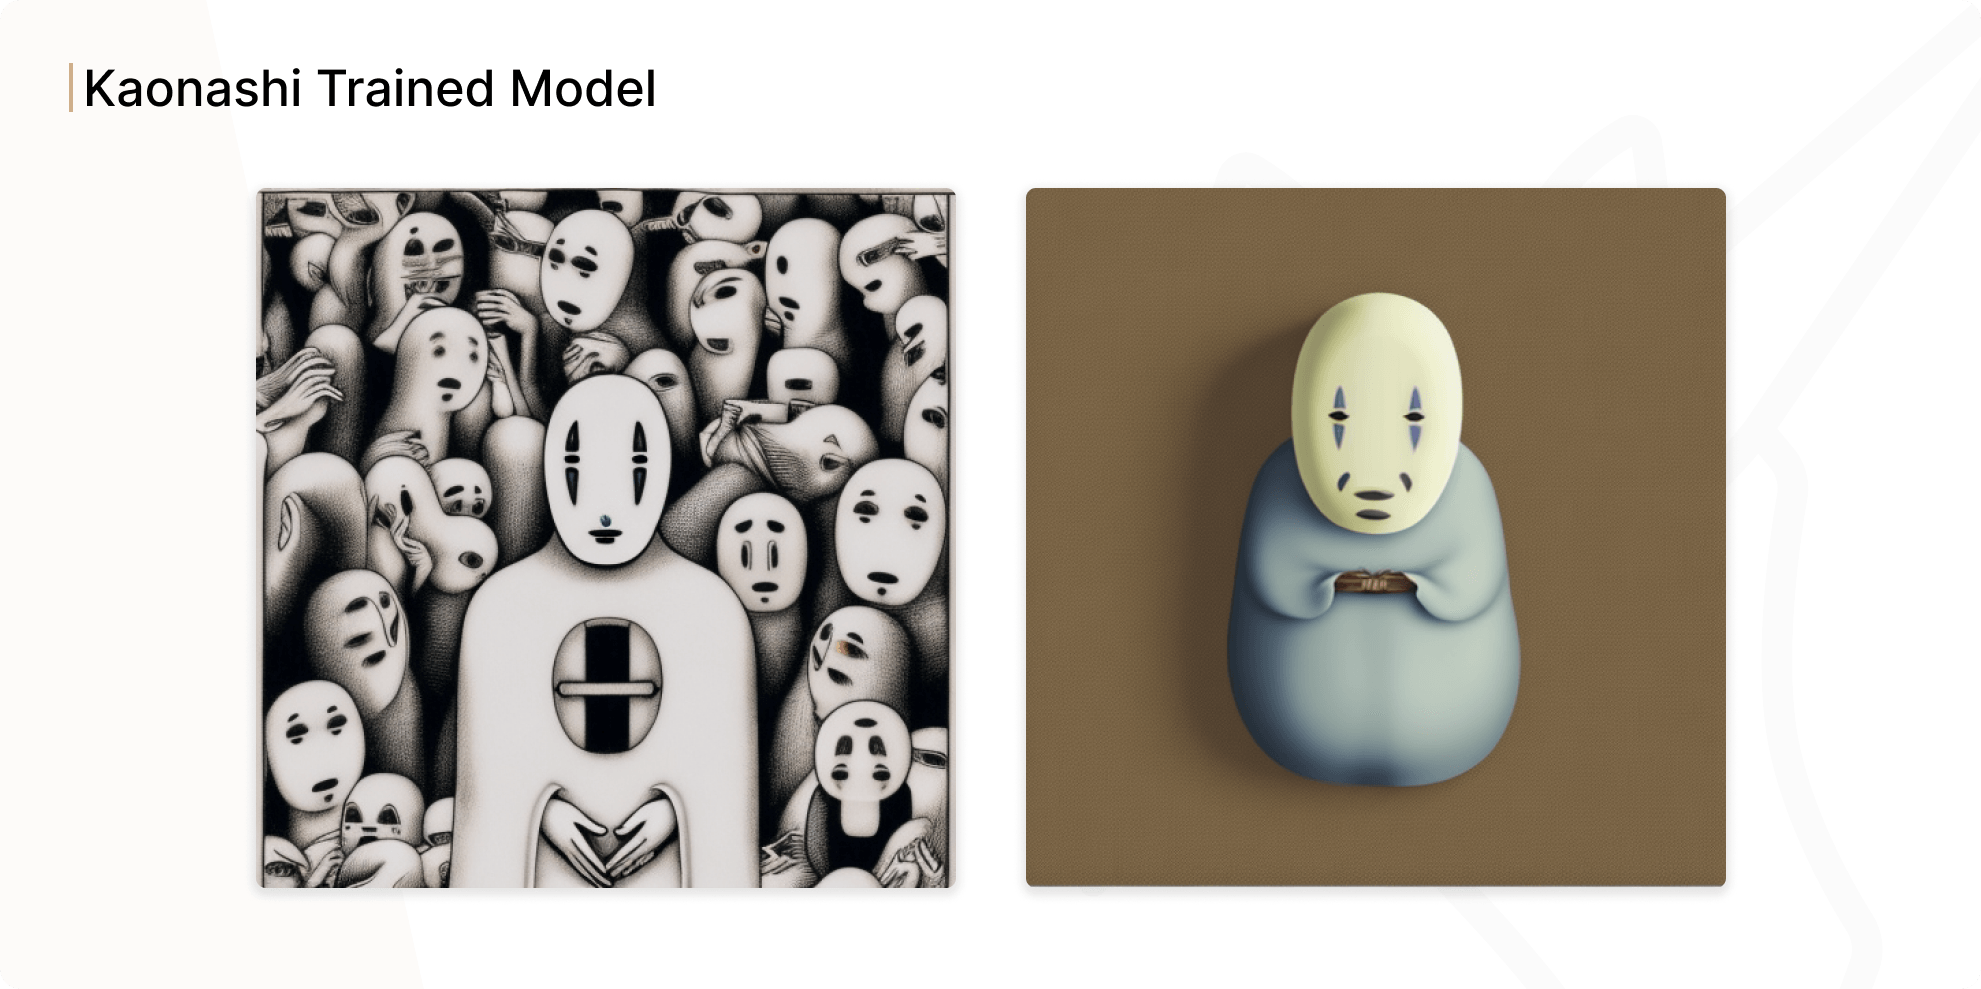
After choosing an interface to work on, we started to train our own model to solve the task of creating an overweight person. Of course, you can choose existing models to work with, however, training Stable Diffusion with your images will allow you to get more accurate results for your needs.We chose Dreambooth as it is one of the most popular and most accurate Stable Diffusion models. After training on your dataset with Google Colab, the model is saved on the user's Google Drive, which can already be used within the Easy Diffusion web application with a prompt like "photo of {id} in style of...". Before moving on to the task of generating an overweight version of a person in the photo, we tested a toy example: generating images after training the Dreambooth model on Kaonashi figure photos:

The Dreambooth guidelines stated that we need photos of the object at different angles for training. As a result, we obtained the following results with a model trained on just three photos:
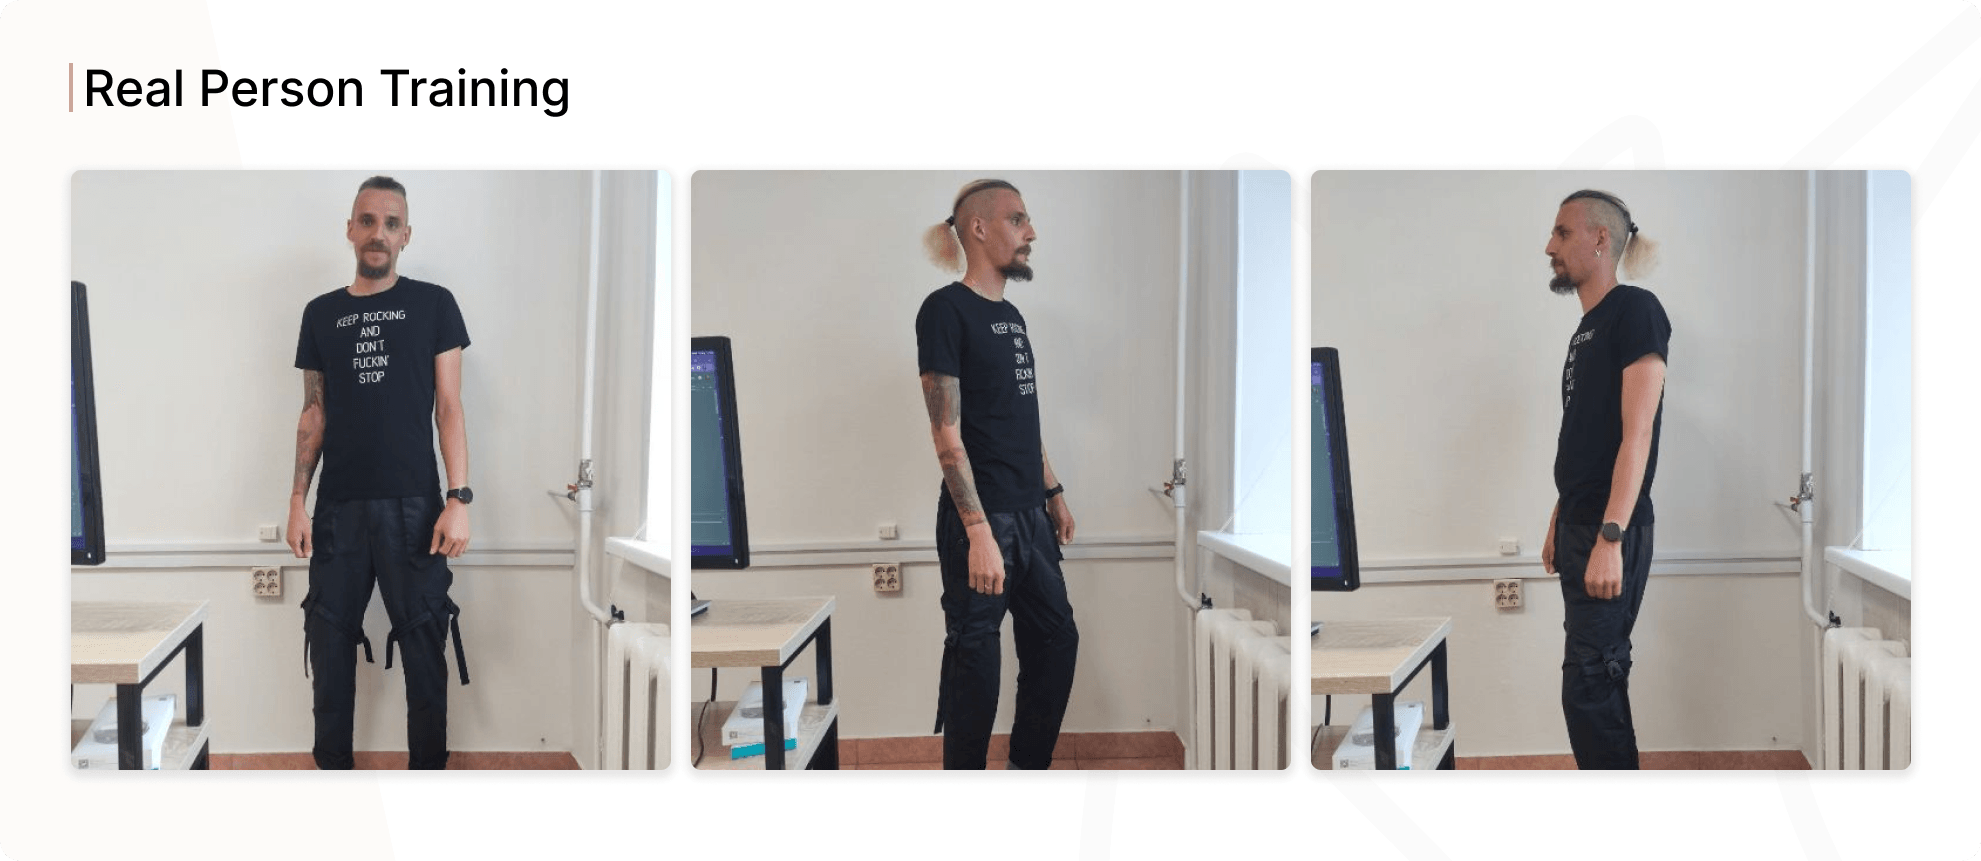
Well, it looks pretty impressive. Once we understood how to train AI Stable Diffusion models, we moved on to our assigned task. We followed a similar principle as with Kaonashi and took photos of a person at different angles:

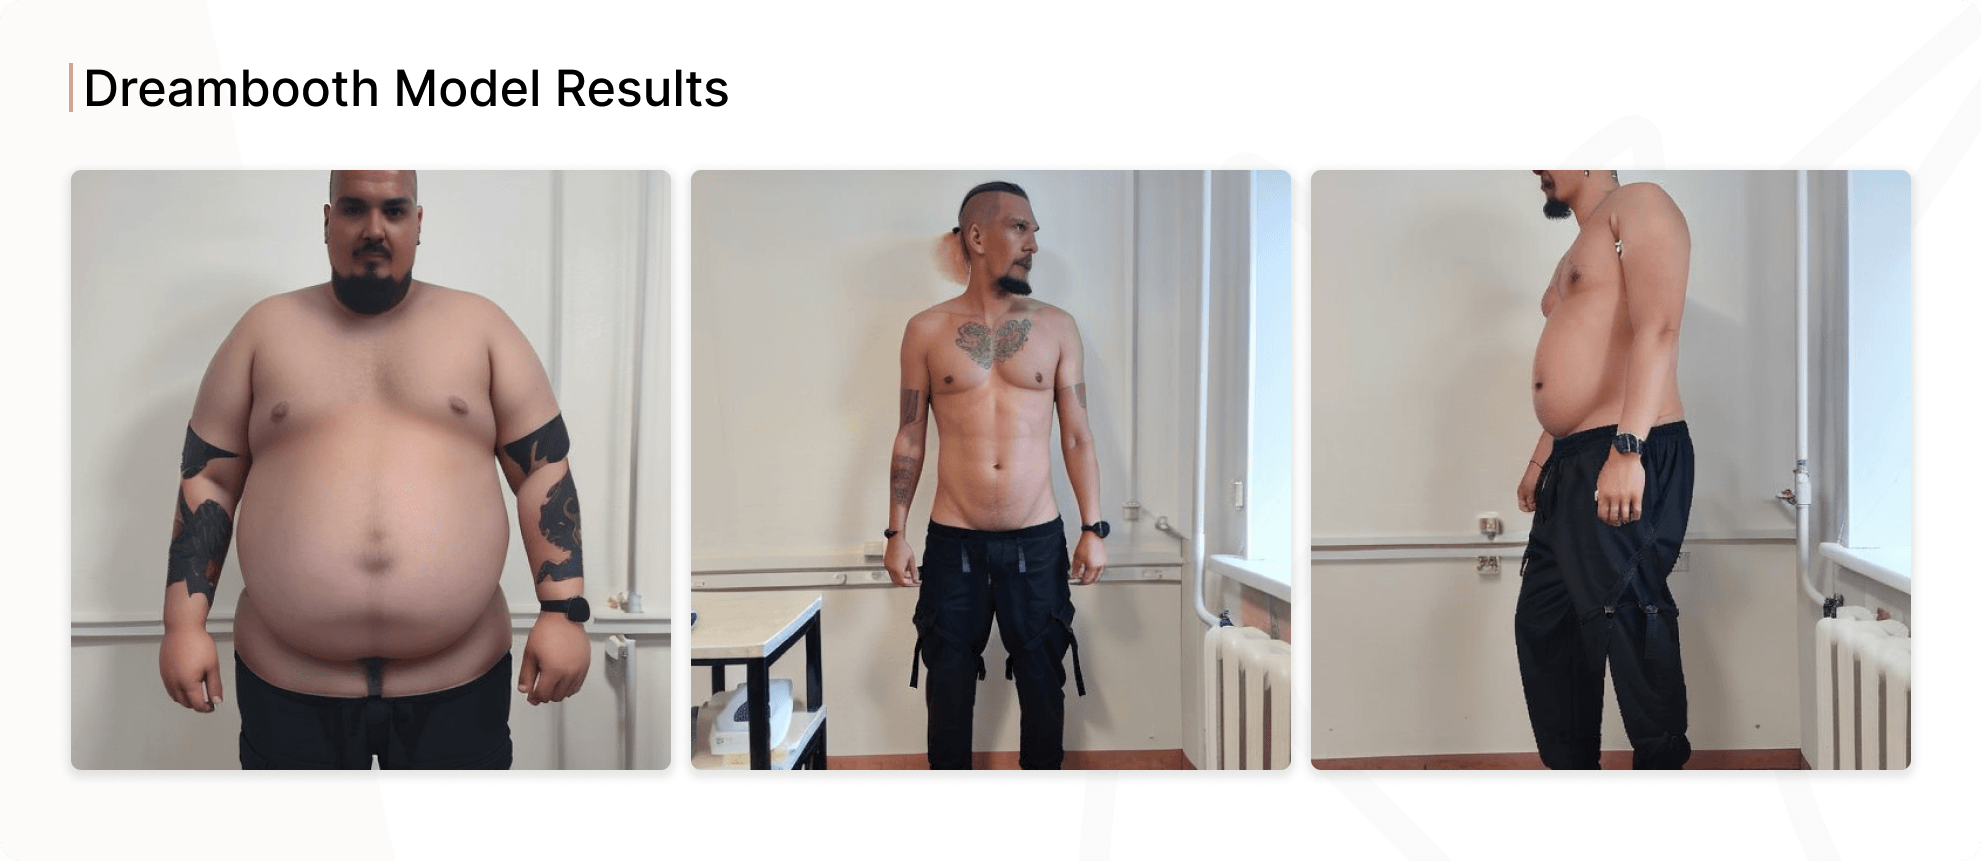
The result was ambiguous: the neural network coped with some images quite well (the first one), somewhere the result was not the most successful (the last one), and somewhere the model performed a completely different task (the middle one):
As a result of working with the Dreambooth model, we identified several problems that greatly affect the quality of task performance:
- To perform the task qualitatively, we need a model that is customized to work with photos of different people, not just one person.
- The Dreambooth model with all compressions weighs about 2 gigabytes, while training was made on a small dataset.
- Locally on the processor, the model generates an image for about 10 minutes. Of course, if the generation was done with a graphics card, the process would be much faster, but what is important here is that it takes so long even for the CPU to generate a small image.
We thought that the solution to the first problem could be training on a big dataset of different people. So we found and preprocessed 25 stock photos of different people from different angles and trained the neural network on them. After that we generated the image from the our photos again, and the best result was the next frame:
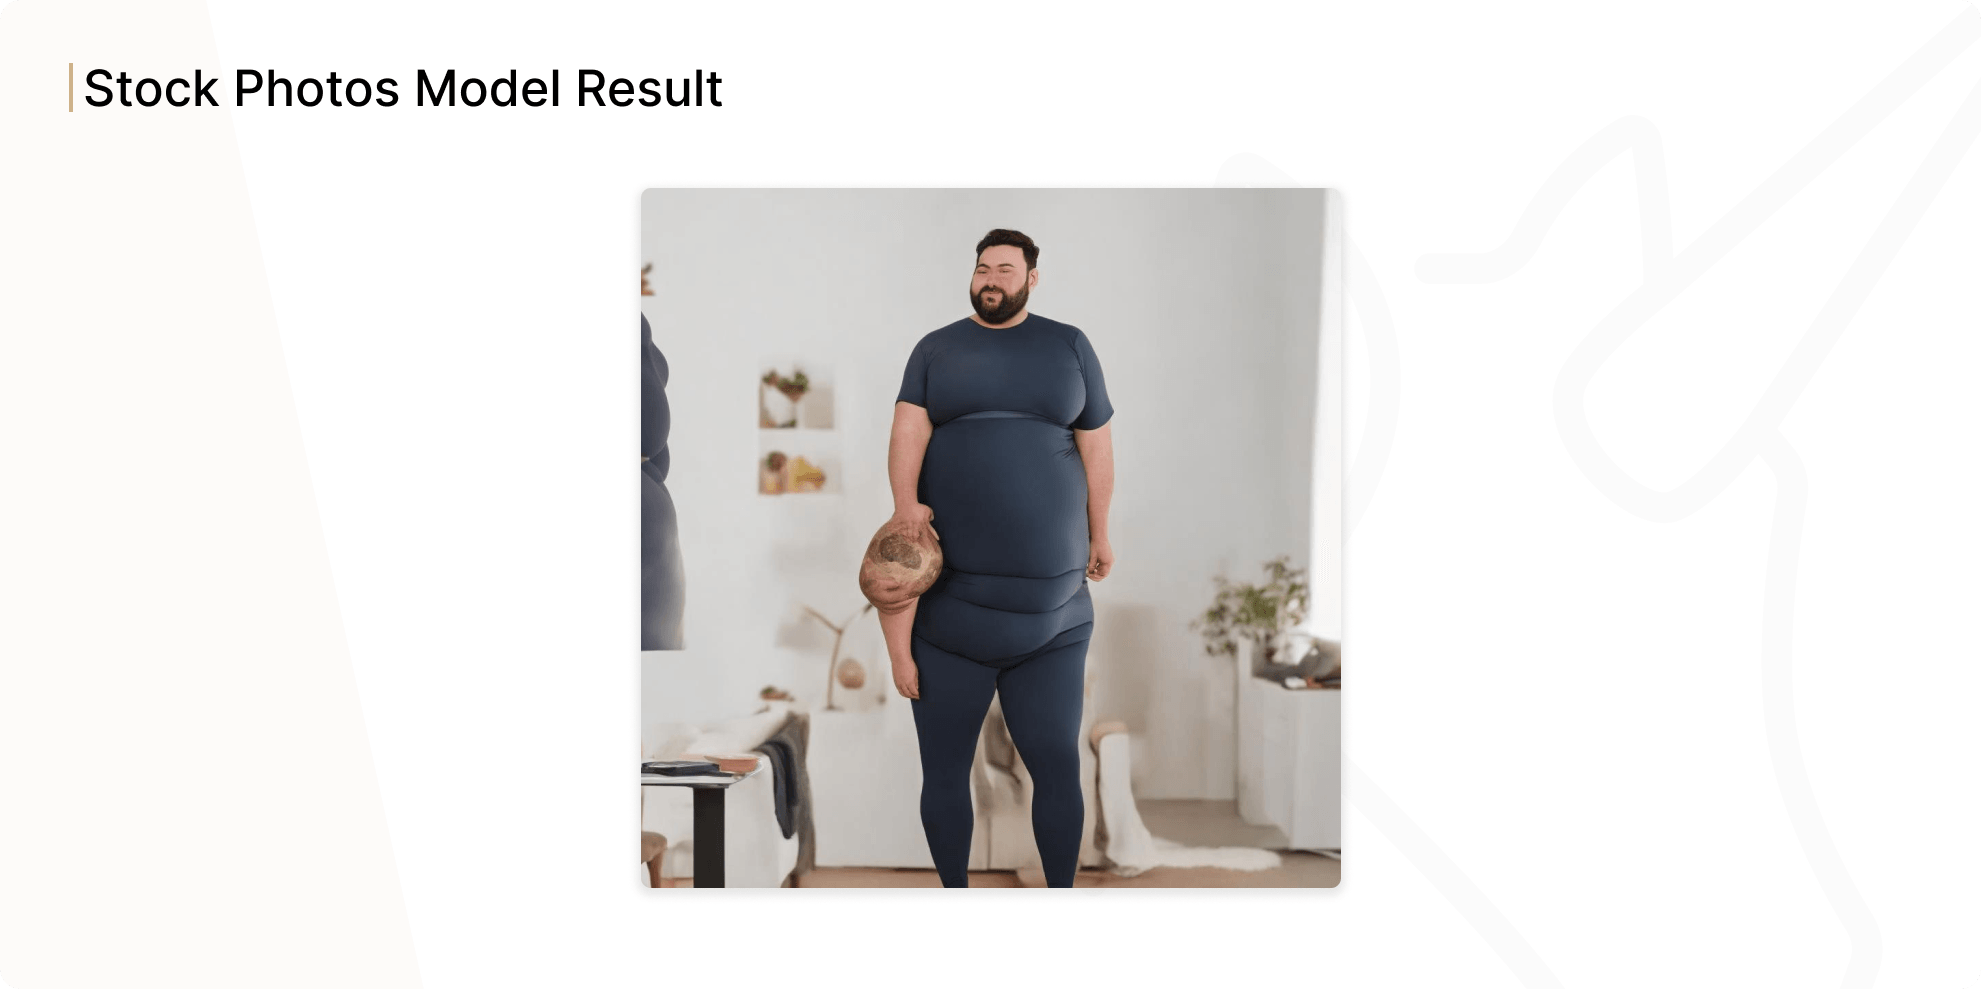
Perhaps training the model on a larger dataset would give a more accurate and physiologically correct picture of a person with extra weight.
Inpainting mode
The next stage of our experiment was Inpainting mode, i.e. modifying a selected part of the photo to preserve the face in the generated image. Easy Diffusion didn’t allow us to implement Inpainting functionality, so we used WebUI from the AUTOMATIC1111, which is more popular and more functional than Easy Diffusion.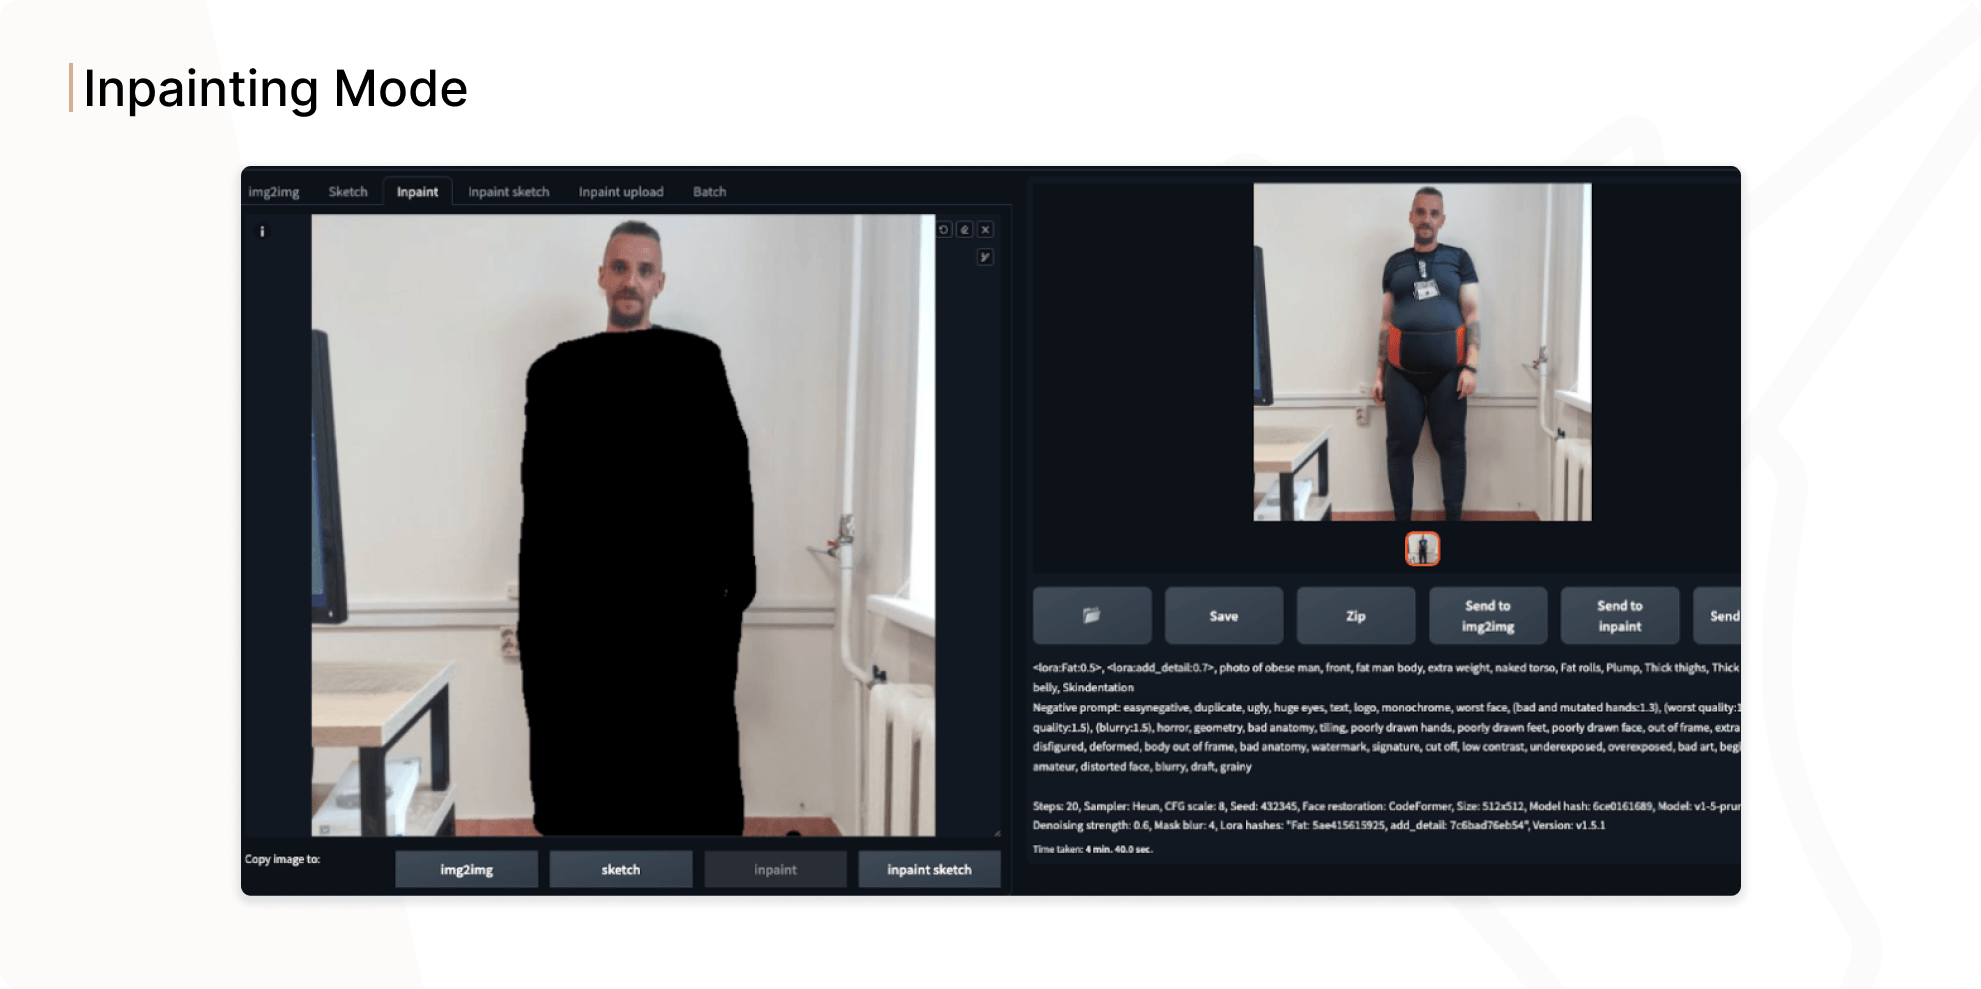
LoRA and LyCORIS add-ons
In parallel with the introduction of Inpainting functionality, we decided to use an add-on for image generation - LoRA, which stands for Low-Rank Adaptation. This method introduces small changes to the main model, optimizing the processing of the image, so this is why it cannot be used alone. However, this method reduces the size of the model from a couple of gigabytes to a few megabytes, and speeds up image generation up to 3 times compared to Dreambooth. We downloaded and tried one of the LoRA methods and tried to generate images using Inpainting and got the following results: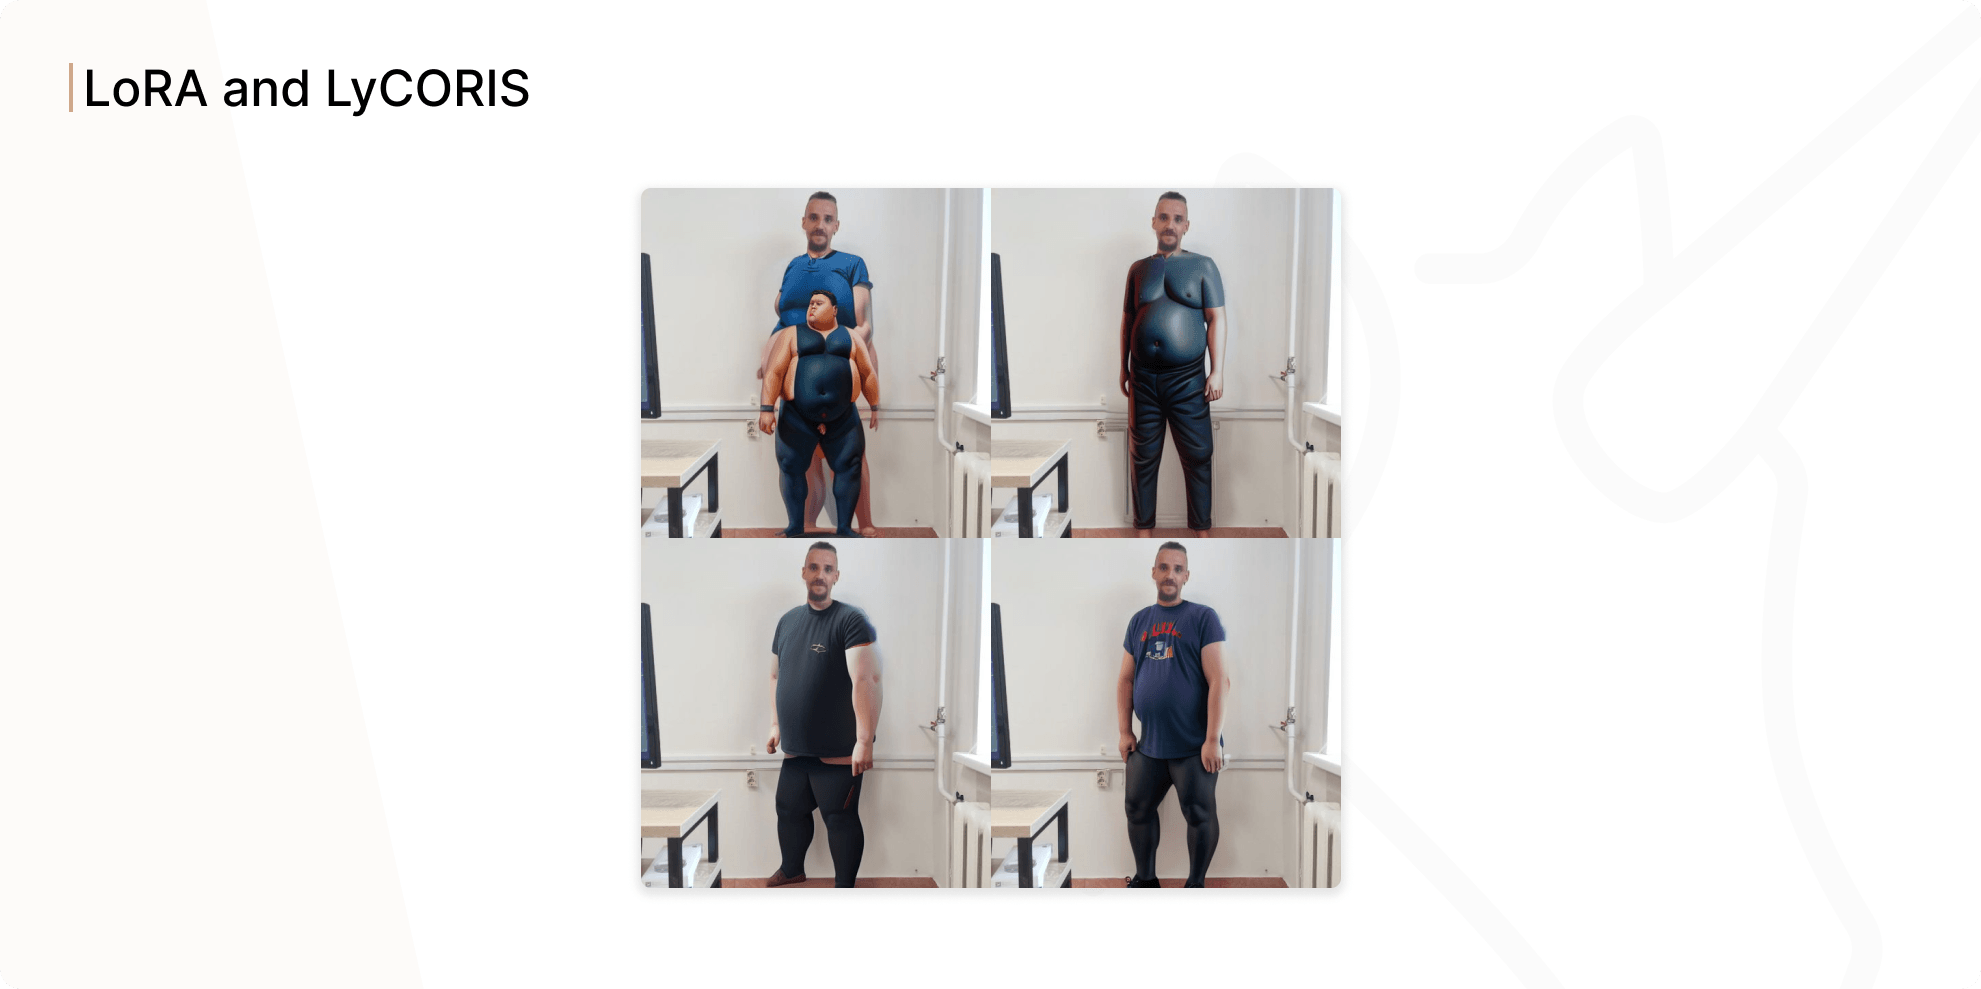
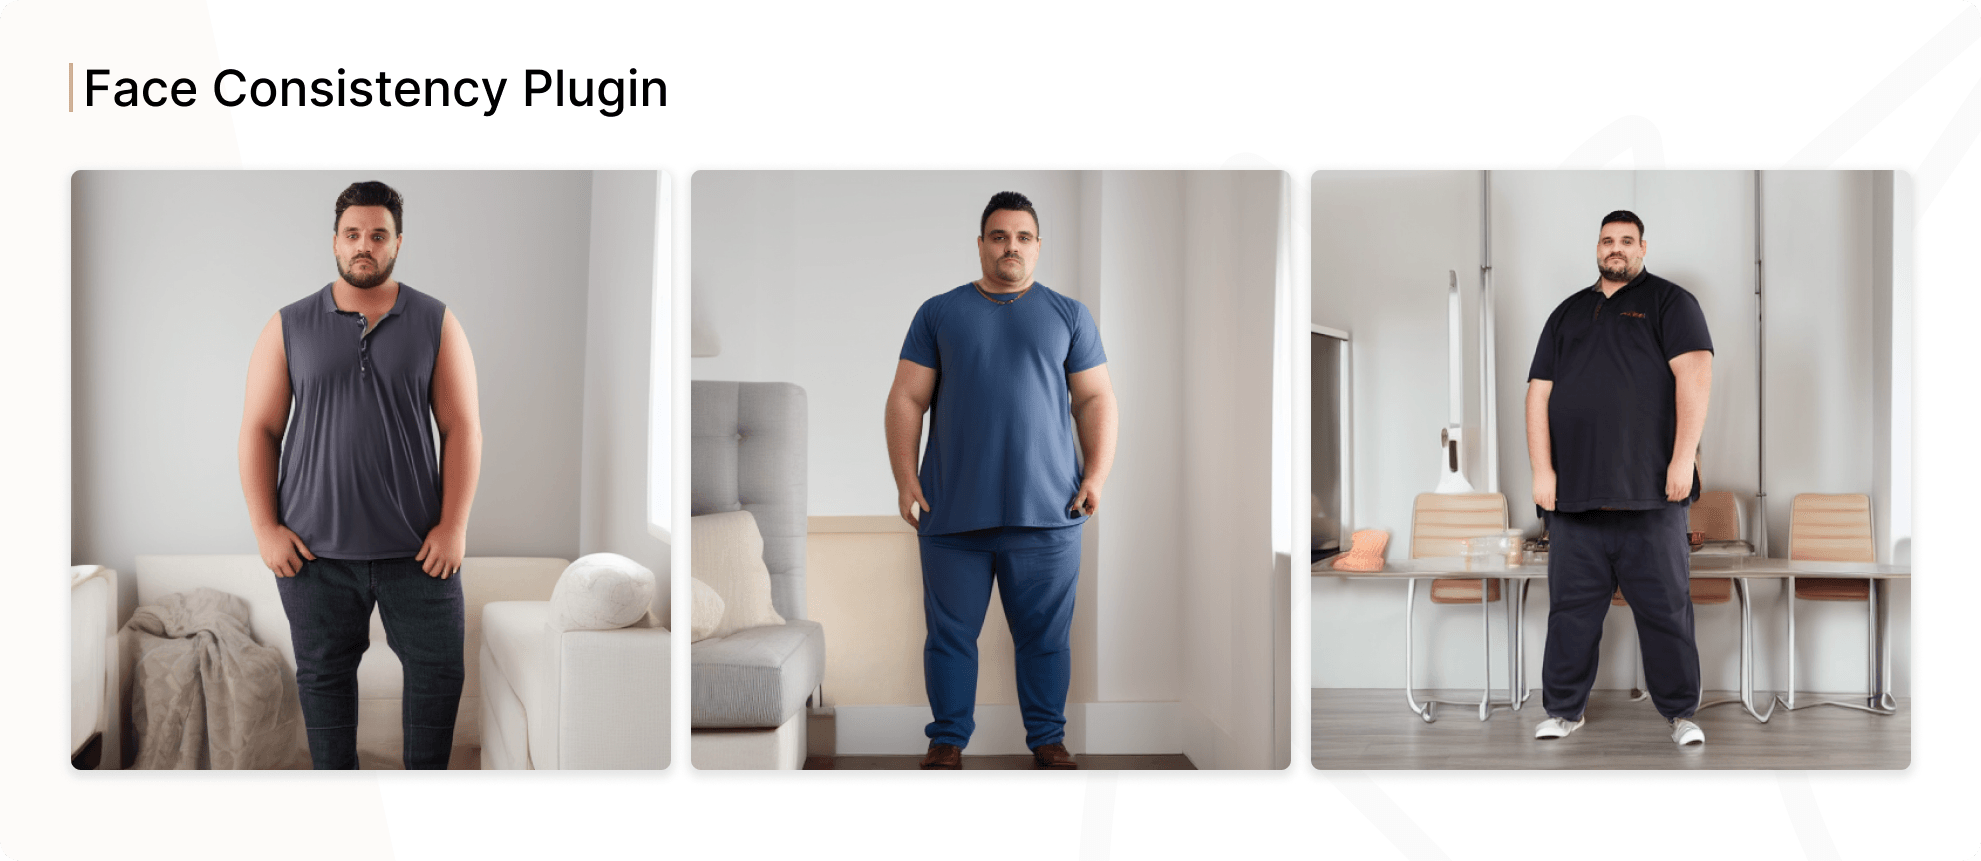
Sometimes this model generates a realistic overweight body, however, the unchanged face looks as unnatural as possible with it, so we added the face consistency plugin, which replaces the face to fit a person's build. As a result, we got quite good outputs.
We conducted many experiments, selecting different models and image processing parameters. These are parameters that significantly affect the output result:
- Sampling Method is a mathematical function that specifies the rules for processing the input noise. It affects the image and the generation speed.
- Sampling Steps is the number of iterations. The more iterations, the longer it takes to generate the image and the more detail we get in there.
- CFG Scale (classifier-free guidance scale) is the value of matching the text query. The larger the value, the closer the result will be to the query, but also more noisy.
- Denoising Strength determines how much the input image affects the result (if the value is 0, we will get the same image).
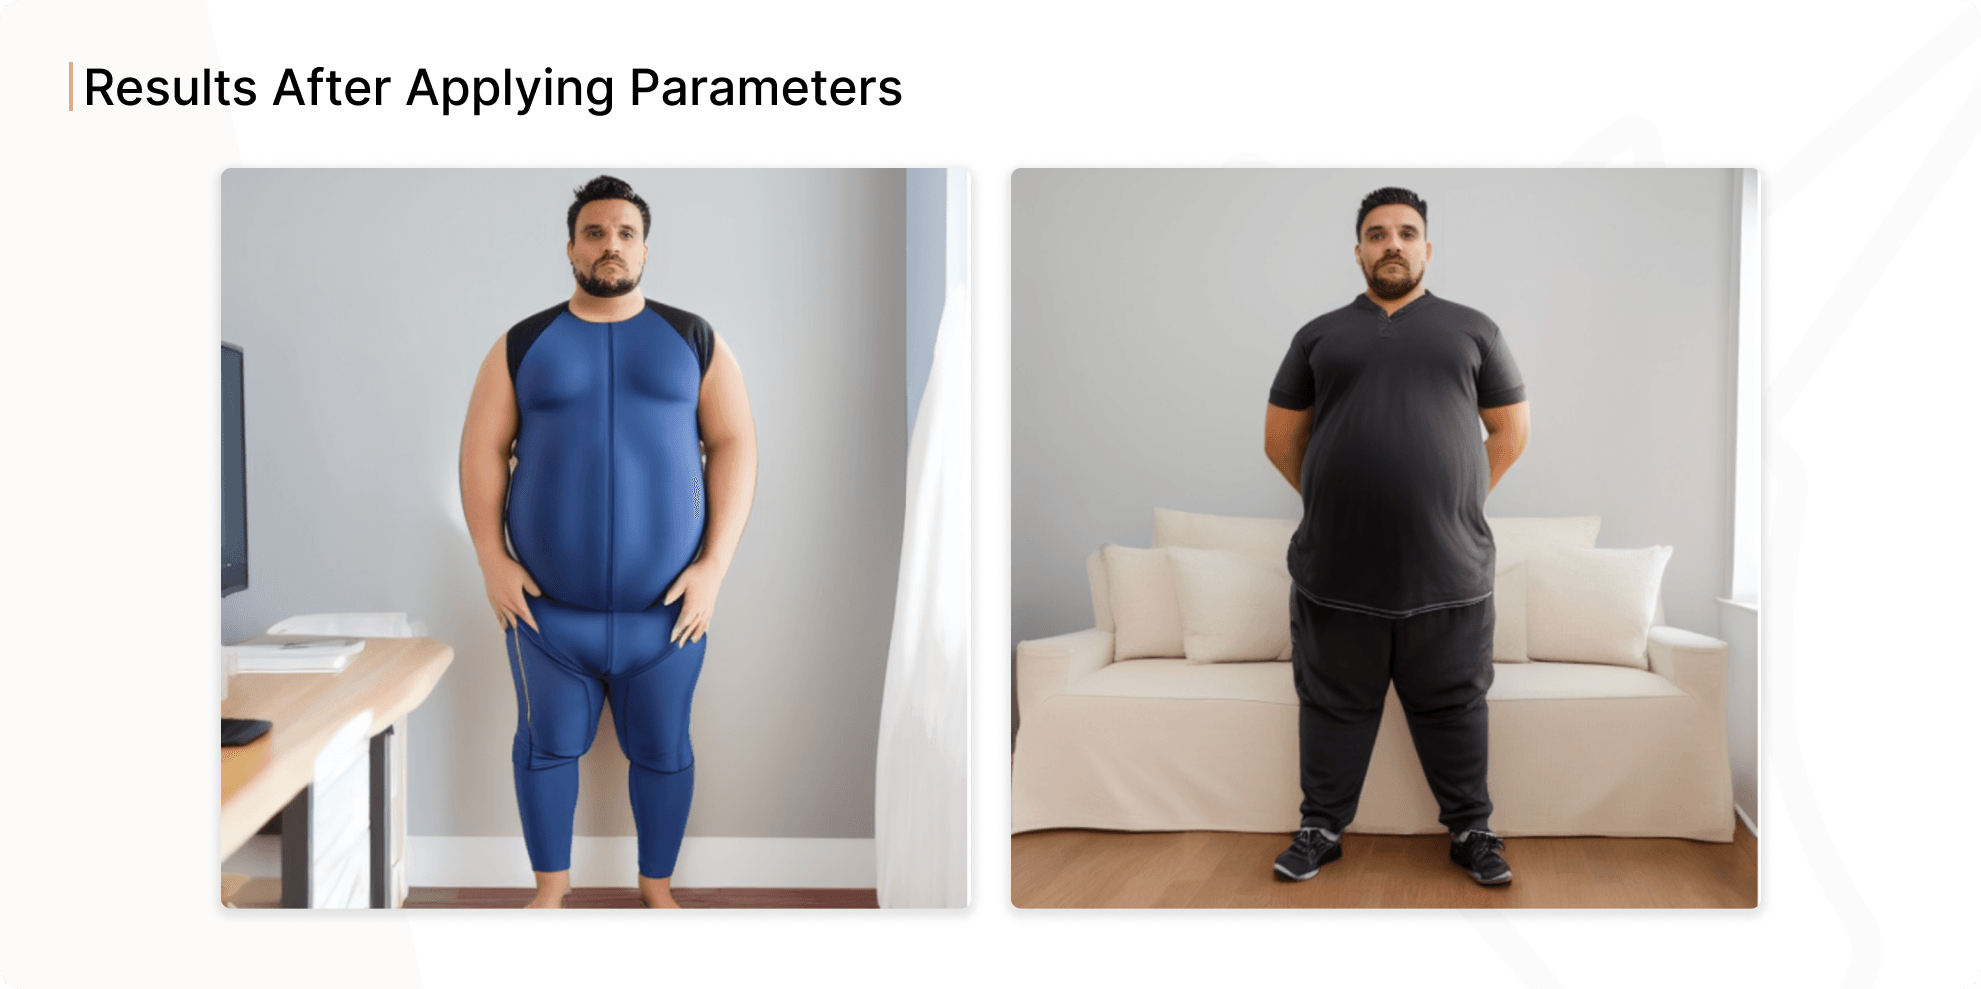
If you apply all these numerous changes, you can get very different results. In general, about 30% of images give a good result:
The final experiment with the LoRA method was training the model using our own dataset (25 stock images we used earlier). After training and selecting the model parameters, we obtained the results:
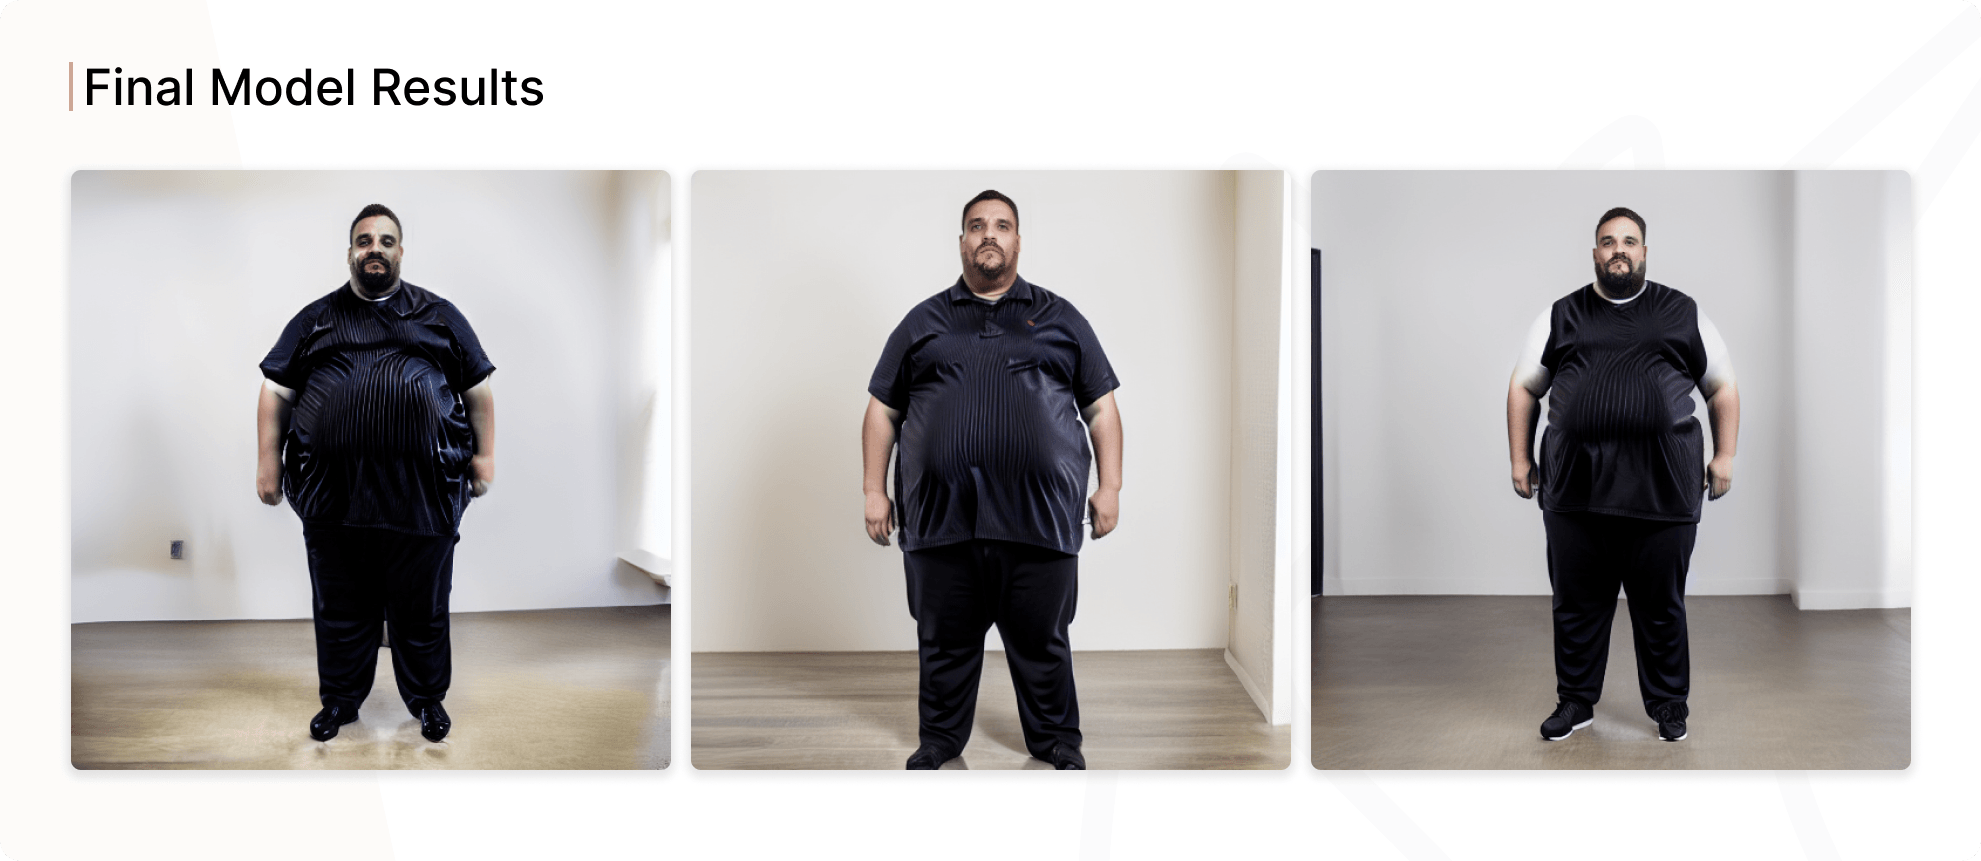
The prompt for Stable Diffusion was as follows (Fat_lora is our trained model):
Prompt: <lora:plump_control_v1.0:0.3>, <lora:Fat:0.2>, <lora:add_detail:0.3>, ultra detailed, ultra-precise depiction, ultra-detailed depiction, obesity, fat, plump, plump male body, man with obesity, extra weight, solo, pretty face, photo of obese person, looking into camera, front looking, realistic, <lora:Fat_lora_v1:0.7>.
Negative prompt: duplicate, ugly, huge eyes, text, logo, monochrome, worst face, ugly face, mutated face, (bad and mutated hands:1.3), (worst quality:1.5), (low quality:1.5), (blurry:1.5), horror, geometry, bad anatomy, tiling, poorly drawn hands, poorly drawn feet, poorly drawn face, out of frame, extra limbs, extra fingers, disfigured, deformed, body out of frame, bad anatomy, watermark, signature, cut off, low contrast, underexposed, overexposed, bad art, beginner, amateur, distorted face, blurry, draft, grainy.
The images look good, but we think that if you select the parameters in prompt more precisely, the results can be improved.
Another extension that speeds up the model is LyCORIS. It is similar to LoRA because it has the same principles as LoRA methods, however it is considered more refined and more advanced because it modifies more parts of the underlying model. LyCORIS captures more fine details than LoRA with the same training dataset.
Using the model refined by LyCORIS methods makes the following results:

The prompt for the generation via Stable Diffusion looked as follows (microwaist is a model that we found on CivitAI library):
<lora:plump_control_v1.0:0.3>, <lora:Fat:0.2>, <lora:add_detail:0.3>, ultra detailed, ultra-precise depiction, ultra-detailed depiction, obesity, fat, plump, plump male body, man with obesity, extra weight, solo, pretty face, photo of obese person, looking into camera, front looking, realistic, <lora:Fat_lora_v1:0.3>, <lora:microwaist_4_z:1.2>
Conclusion
Training and tuning models for generative AI and, in particular, Stable Diffusion may seem somewhat complicated and incomprehensible, but if you approach this task with intelligence and understand how all the processes of preparing neural networks for work take place, you can get an excellent product for further use.We actively use AI tools in our work and actively implement them in our projects. So if you have an idea of using AI solutions in your business, and you have questions about how to do it, then fill in the form on our website, and we will be happy to answer all of your questions and tell you how to effectively implement AI solutions in your processes and products.